Paper airplanes have been a childhood pastime for generations. People have been making them for so long that there are dozens of different designs, from the classic “Spiteful Bird” to the more modern “Ribbon Glider.” The great thing about paper airplanes is that, with the right instructions, anyone can make one in just a few minutes!
Arts & Architecture: Paper Airplane Instructions
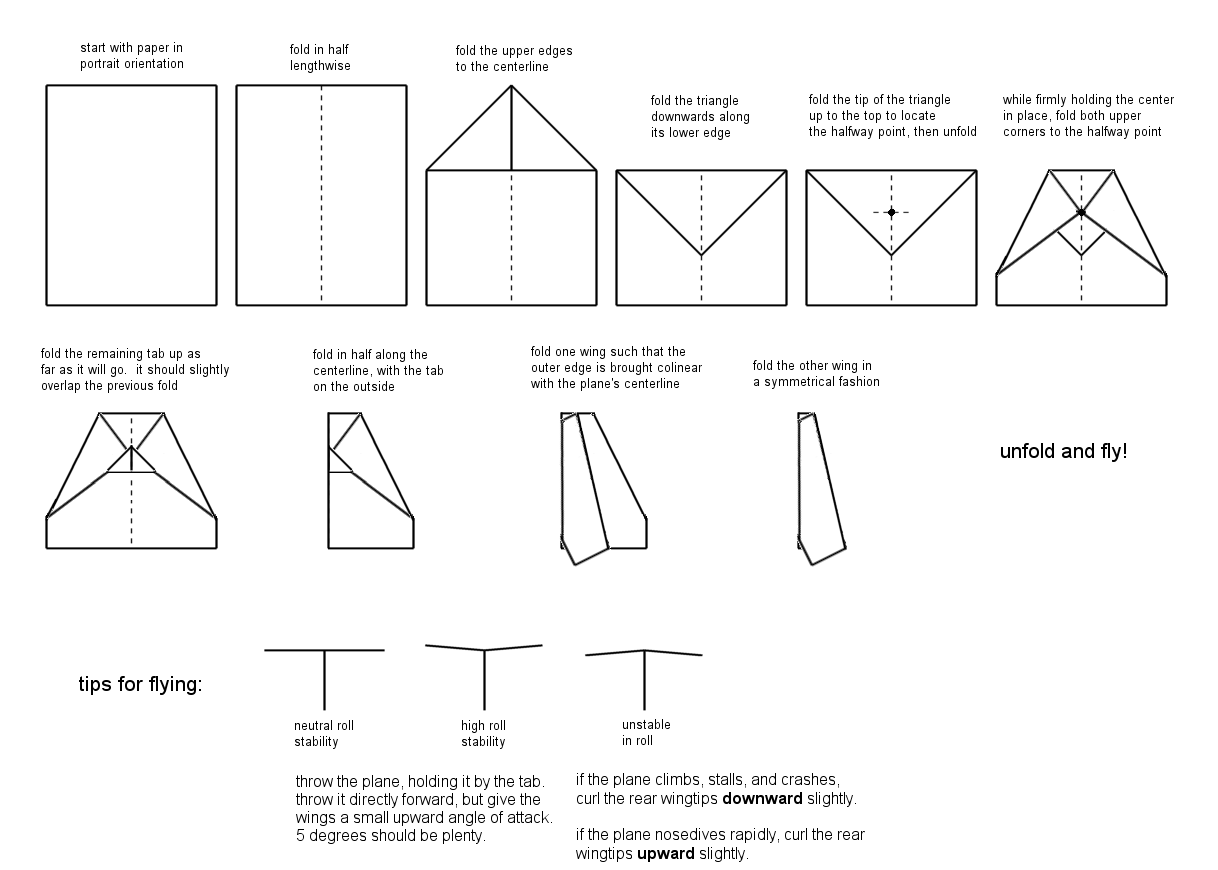 This design is one of the most iconic paper airplane designs out there — a simple, efficient flyer that has been around since the mid-1900s. To make this plane, start with a square piece of paper. Fold the bottom edge of the paper up to the top and then fold it in half. Fold the top corners in towards the center fold, and then make two reverse folds along the sides. Flip it over and fold the wings down, and you’re done!
Printable Paper Airplane Template Inspirational 8 Paper Airplanes
 This plane is another classic, and what’s great about it is that it’s easily customizable. Start with a square piece of paper and fold it in half. Fold the top corners in towards the center fold, then fold the top edge down to meet the bottom edge. Unfold the top edge, then fold the side edges in to the center fold. Fold the plane in half, then fold the wings down. Finally, fold the bottom edge up to the top to give the plane stability and a longer flight path. You can customize the plane by adding your own decorative folds and shapes.
Paper Airplane Printable Template Sheets
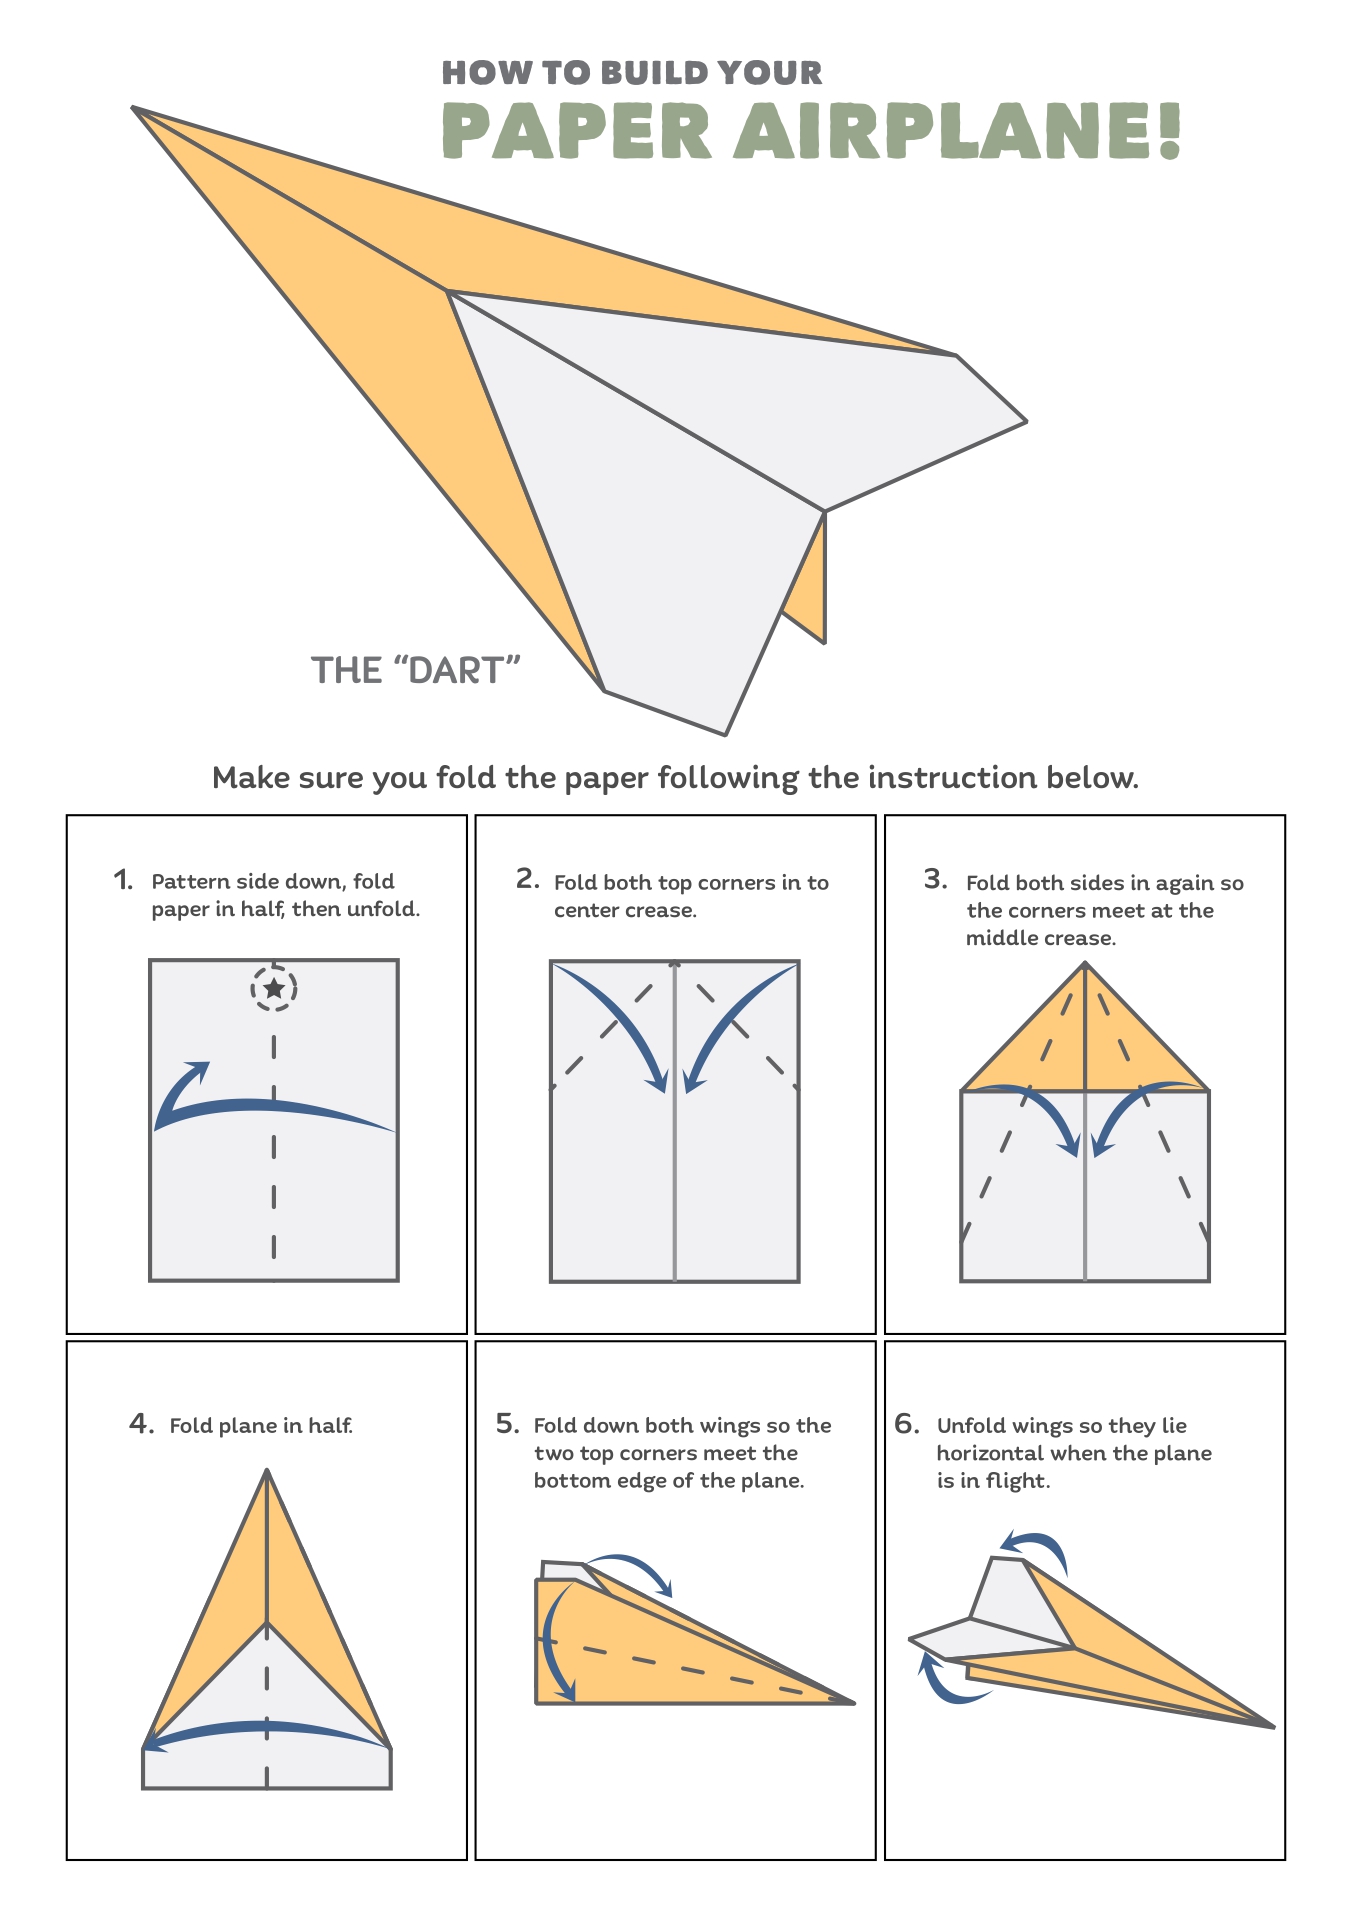
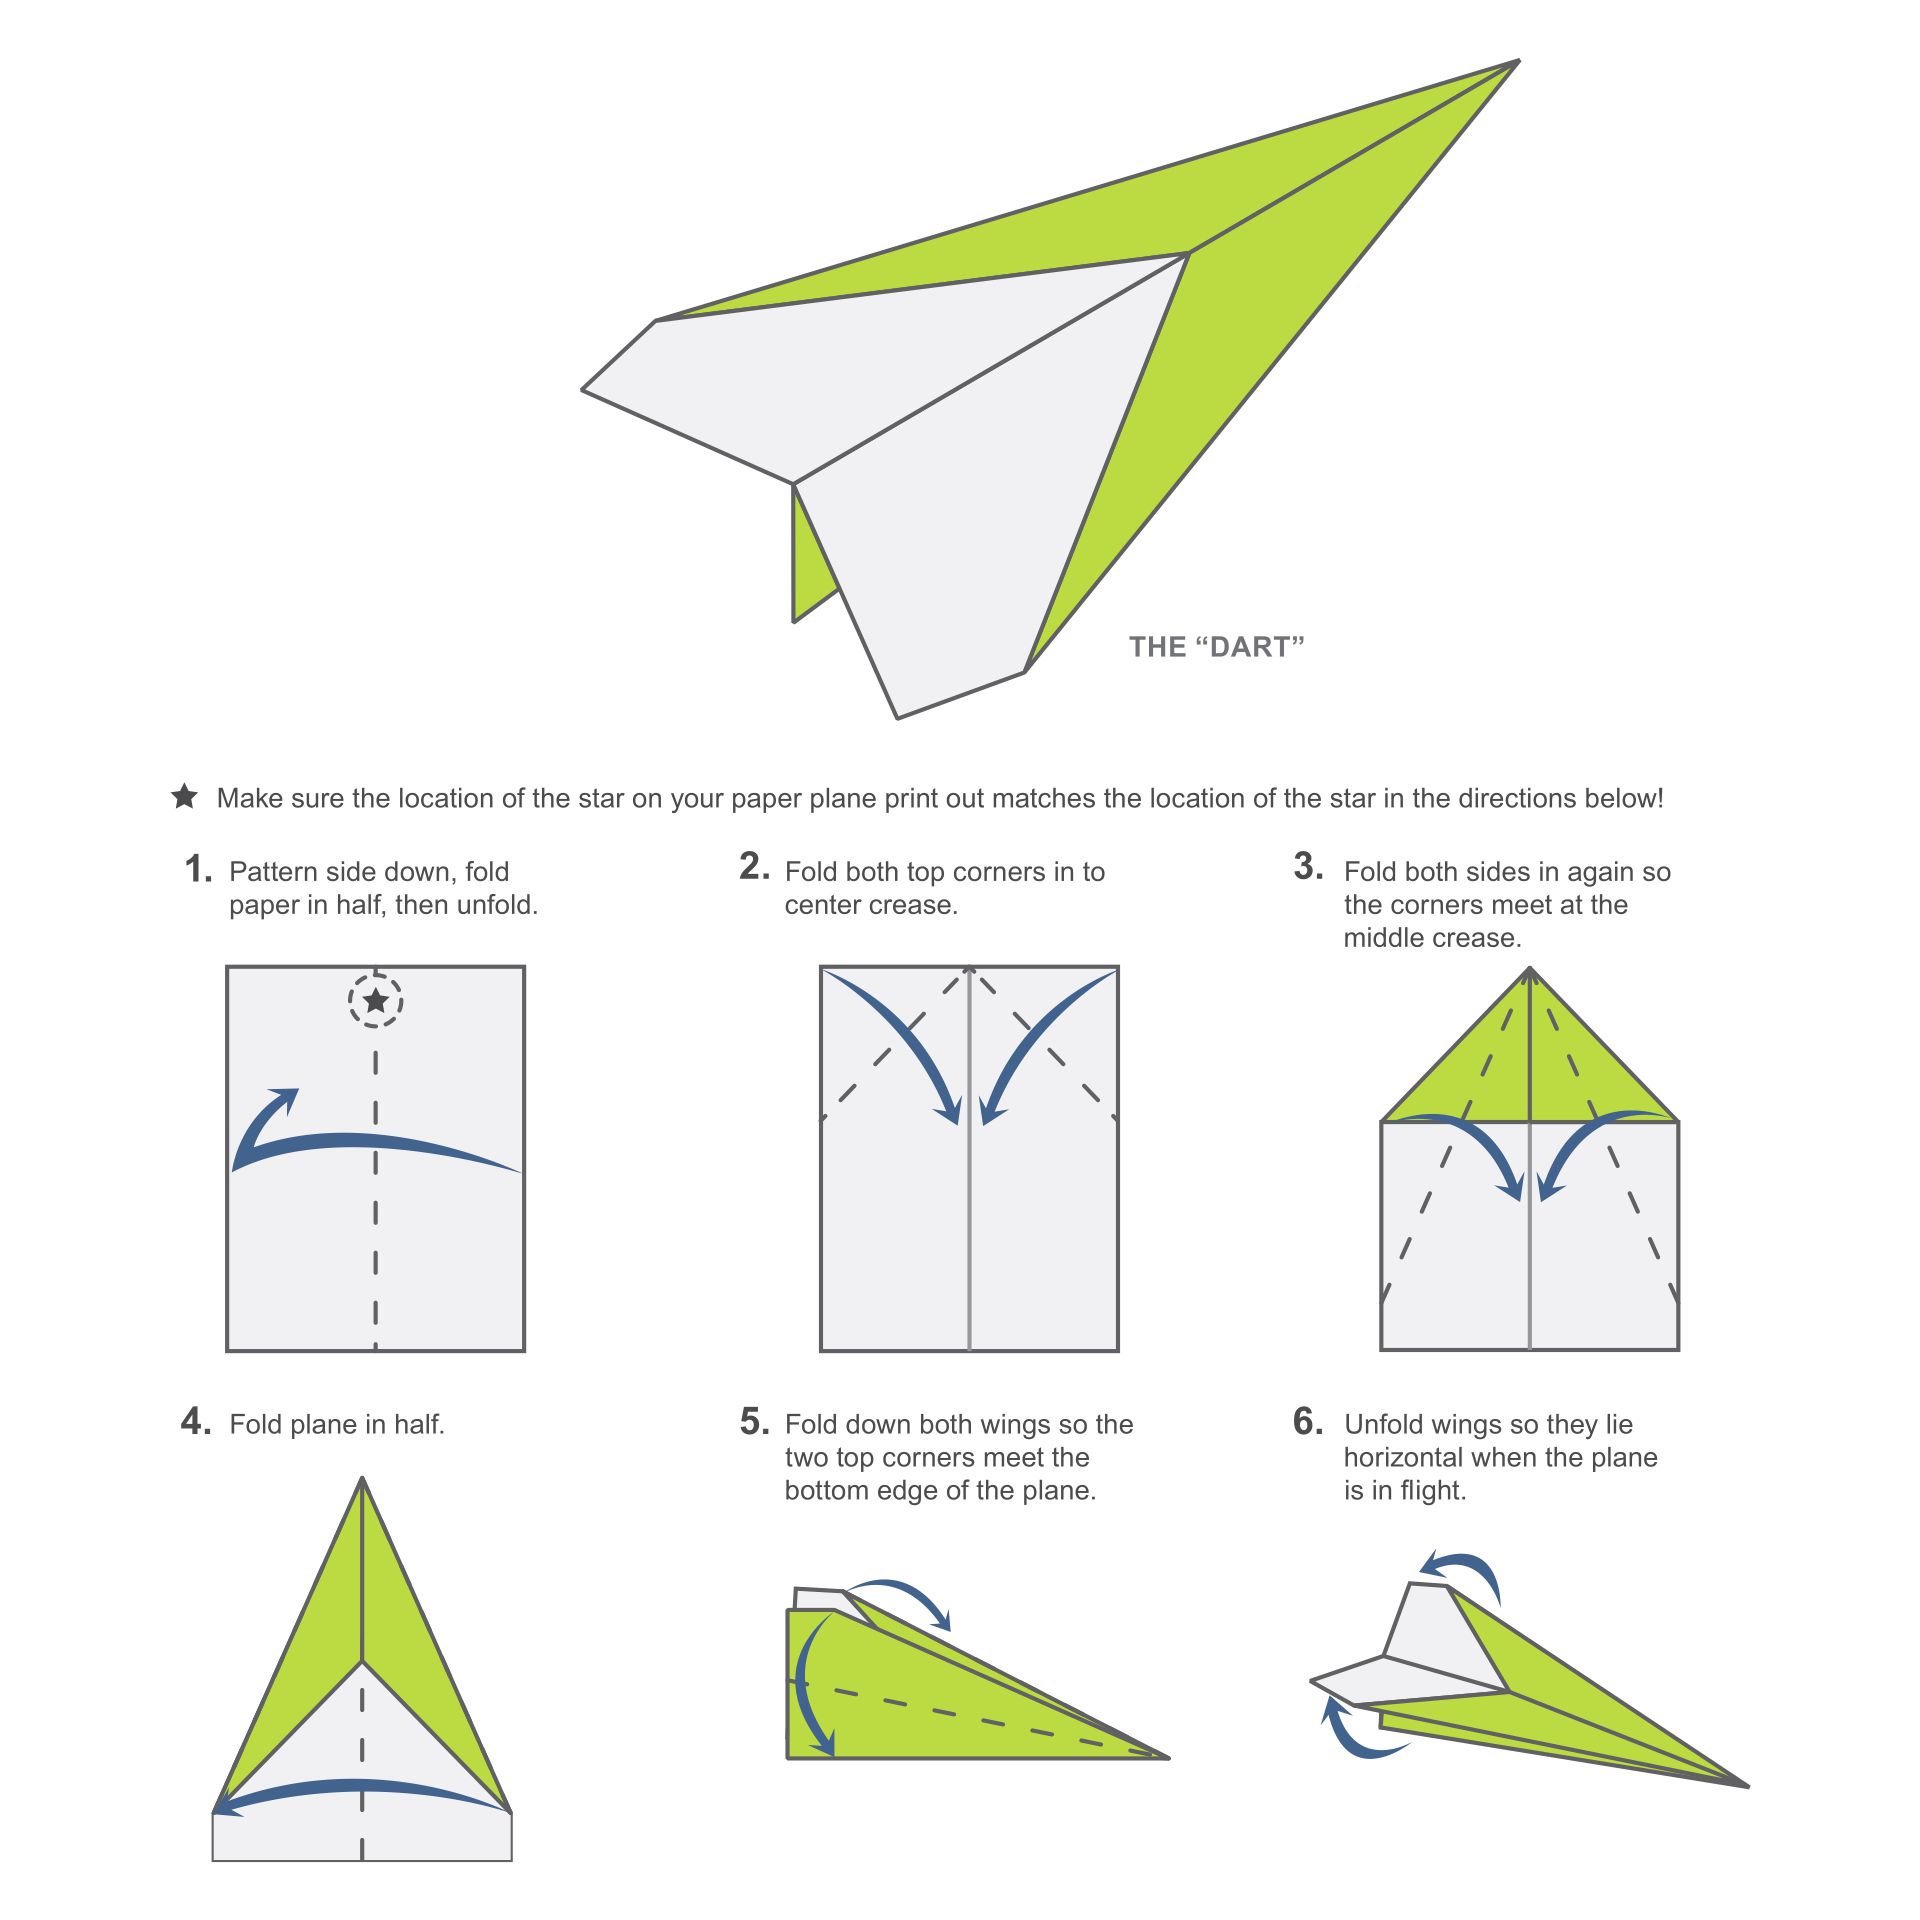 This design is a bit more complex, but it results in a higher-flying plane with more stability. Start with a square piece of paper and fold it in half. Unfold, then fold the top corners down to meet the center crease. Make a few folding and tucking maneuvers to add stability to the plane, then fold the bottom edge up to the top. Make two small reverse folds at the front, then fold the wings down and you have a plane that’s ready to fly!
How To Make Paper Airplanes
 This design is perfect for those who want to experience the thrill of flight without getting too complicated. Start with a square piece of paper and fold one side to the center. Reverse fold the top corners to the center and make two more reverse folds. Fold the top edge down to meet the bottom edge, then fold the wings down. Reverse the corners of the wings to add stability and you’re ready to go!
Addictionary
 This design is perfect for the beginner who wants a plane with excellent stability. Start with a square piece of paper and make a few folding and tucking maneuvers. Make small reverse folds at the front of the plane, then fold the bottom edge up to meet the top edge. Fold the wings down, and you’re done!
Paper Airplane Template
